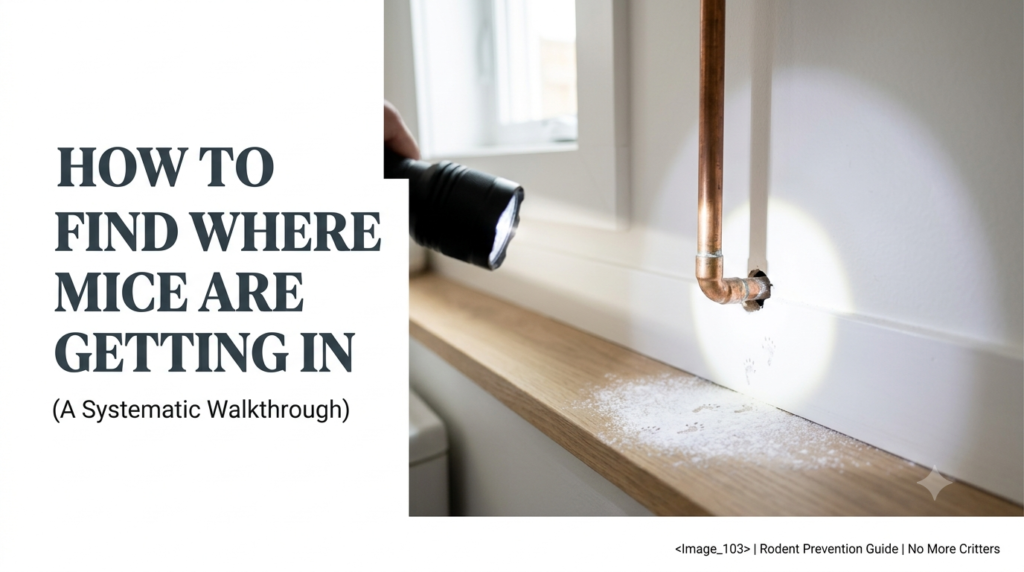
You’ve heard the scratching. You’ve found the droppings. Now comes the actual hard part — figuring out exactly where mice are getting in, so you can seal it and stop the problem at the source instead of fighting an endless rotation of new arrivals.
Mice can fit through a gap as small as a dime — about 6mm. That’s smaller than most people think to look for. Here’s a systematic way to find every entry point, inside and out.
Why Finding the Entry Point Matters More Than Trapping
Setting traps without sealing entry points means you’re managing an ongoing problem rather than solving it. Every mouse you remove can be replaced by another coming through the same unsealed gap.
Mice don’t burrow through solid walls — they exploit existing gaps. A house with no structural openings doesn’t get a mouse problem regardless of how appealing the food and shelter inside might be. Finding and sealing the actual entry point is the only thing that produces a lasting result.
What You’ll Need
- A flashlight, ideally a bright LED
- A small mirror (helpful for awkward angles)
- Flour or talcum powder
- A notepad or your phone to mark locations
- Steel wool and caulk for sealing once you’ve found the gaps
Start With the Evidence Already in Your Home
Before searching for entry points, identify which areas mice are actively using. This narrows the search significantly.
Look for:
- Droppings — concentrated trails point toward both the food source and the entry point
- Gnaw marks on baseboards, door frames, or food packaging
- Greasy rub marks along walls — the oil and dirt on a mouse’s fur leaves a smudge along their regular travel path
- Shredded material — paper, fabric, or insulation gathered for nesting
The location of the heaviest activity tells you which exterior wall or area to focus your search on first.
The Flour Tracking Technique
This is one of the most effective ways to confirm exactly where mice are traveling.
Dust a thin, even layer of flour or talcum powder along the floor near a suspected entry point or travel path, right before bed. In the morning, check for footprints. The direction of the tracks tells you which way mice are moving and can lead you directly to the gap they’re using. This works especially well near baseboards, behind appliances, and along walls where droppings have been found.
Interior Inspection — Where to Look
Kitchen: Check underneath and behind the refrigerator, stove, and dishwasher. Check the back wall inside lower cabinets, especially where plumbing enters from below. Look at the gap where countertops meet the wall.
Bathrooms: Check under the sink where pipes enter the wall. Check around the base of the toilet.
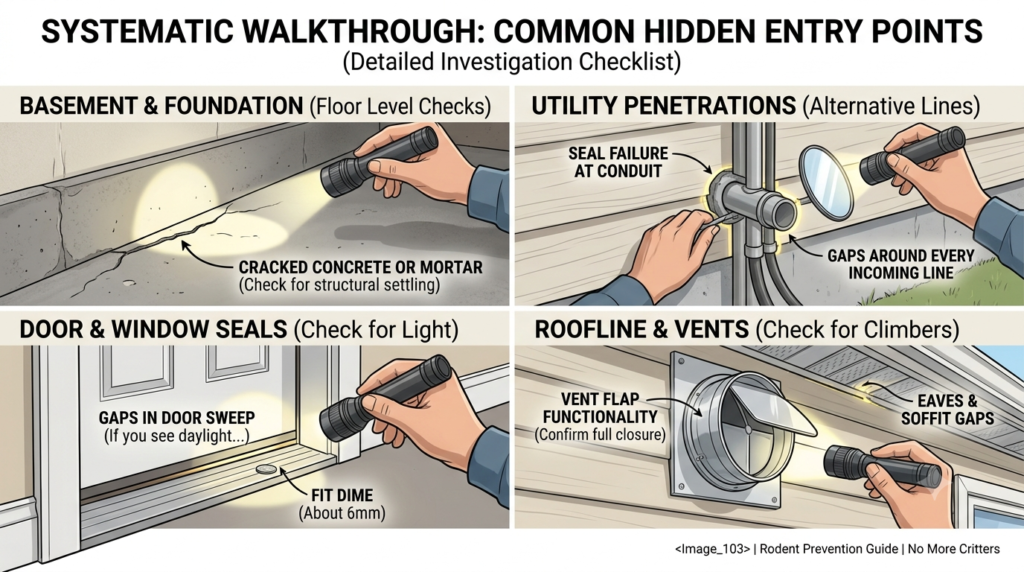
Basement and crawl space: Inspect the entire foundation wall at floor level. Check around any sump pump installation. Look at where utility lines — electrical, water, gas — penetrate the foundation.
Closets and storage areas: Check floor-level corners, particularly in closets that share a wall with the exterior.
Attic: Inspect where roof meets walls, around any vents, and along the eaves. Check for daylight visible from inside — any point where you can see light from outside is large enough for mice.
Behind large appliances: Washing machines, dryers, and water heaters often have utility penetrations behind them that go unchecked for years.
Exterior Inspection — Where to Look
Foundation: Walk the entire perimeter at ground level. Look for cracks in concrete or crumbling mortar between bricks or blocks — these expand over time and are commonly overlooked.
Utility penetrations: Every pipe, cable, vent, and wire that enters the house from outside creates a potential gap. Check around water lines, gas lines, electrical conduit, and cable or internet lines.
Dryer and bathroom exhaust vents: Check that vent flaps close properly and that the surrounding seal is intact.
Garage: Check where the garage door meets the ground — uneven pavement often leaves gaps along the bottom seal. Check where the garage wall meets the foundation.
Roofline: Inspect where the roof meets the walls, around the eaves, and at any roof vents. Mice are capable climbers and will use tree branches, downspouts, and even rough siding texture to reach higher entry points.
Doors and windows: Check for visible daylight under exterior doors — if you can see light, a mouse can fit through. Inspect window screens and frames for gaps.
How Small a Gap Actually Matters
A mouse’s skull is the limiting factor for what it can fit through — and a mouse’s body is remarkably flexible once the head fits. As a working rule: any gap you can fit a pencil through is large enough for a mouse to exploit. Gaps the width of a dime (about 6mm) are sufficient for adult mice; young mice can fit through even smaller openings.
This means gaps that look insignificant — a thin crack along a window frame, a small space around a cable line — are not too small to worry about.
What to Do Once You Find the Entry Points
Document each location before sealing — a quick photo or note helps you track what’s been addressed, particularly if you’re finding multiple gaps.
Small gaps (up to about 1 inch): Pack steel wool tightly into the opening, then seal over it with caulk. Mice cannot chew through steel wool the way they can chew through plain caulk or expanding foam — the abrasive fibers deter gnawing.
Larger openings: Use galvanized metal mesh or sheet metal as a base layer, then seal the edges with caulk for a weatherproof finish.
Under doors: Install or replace door sweeps so there is no visible gap at floor level.
Vents: Install vent covers with mesh screening fine enough to block rodent entry while still allowing airflow.
For full identification and treatment guidance, see our complete mouse guide.
After Sealing — What Comes Next
Once entry points are sealed, place snap traps along interior walls near where activity was previously observed — any mice already inside need to be addressed since sealing alone doesn’t remove an existing population.
Check sealed areas monthly. Mice can occasionally reopen small gaps in caulk or foam, and seasonal settling can create new ones. A brief monthly walkthrough of the same checklist catches new vulnerabilities before they become entry points.
When to Call a Professional
If you’ve conducted a thorough inspection and still can’t locate the entry point, or if activity continues despite sealing visible gaps, a professional can use tools like micro-cameras, UV smoke tracing, and tracking powder across a wider area to pinpoint hidden entry points — particularly useful when the path involves wall voids or areas not accessible during a standard inspection.
We can match you with vetted local exterminators — no spam, no pressure.
No More Critters provides vetted pest identification and treatment information for homeowners. This site is a free service to assist homeowners in connecting with local service providers. All contractors and providers are independent. This site does not warrant or guarantee any work performed.
Filed under